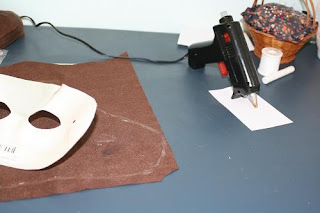
Plastic Mask (you can pick one up at any craft store)
Hot glue gun
Fabric (I used synthetic suede)
scissors
chalk
Leather chord
Step One:
Lay the mask out on the underside of the material and trace roughly around the edges with the chalk. Also scribble in the eye holes. I used this as a rough guide for where I places my fabric.
Step Two:
Then very carefully and taking my time, I started gluing small sections of the fabric to the mask, making sure to smooth out the fabric as I went. I noticed that as i got closer to the eyes, the fabric was wrinkling. You can probably avoid this by starting from the middle and going outwards, or you can use the wrinkles to create features around the eyes. For this mask I only did the upper half first so that the fabric did not wrinkle too much in the lower portion. Also make sure to cut slits for the eye holes and tuck the fabric behind and glue to the back of the mask.
Step Three:
Now using a triangular piece of fabric, glue on the beak. Be careful to smooth as you go to minimize wrinkles. When you are done, poke holes for the leather chord (my plastic mask already had holes) and making a knot in one end, string it through to the other side. Make sure to measure with your head how tight you want the string.
And your done :)


No comments:
Post a Comment